Six measures for home walls in winter to prevent dampness and paint peeling
Read more
Aaj Tak
www.aajtak.in

Six measures for home walls in winter to prevent dampness and paint peeling

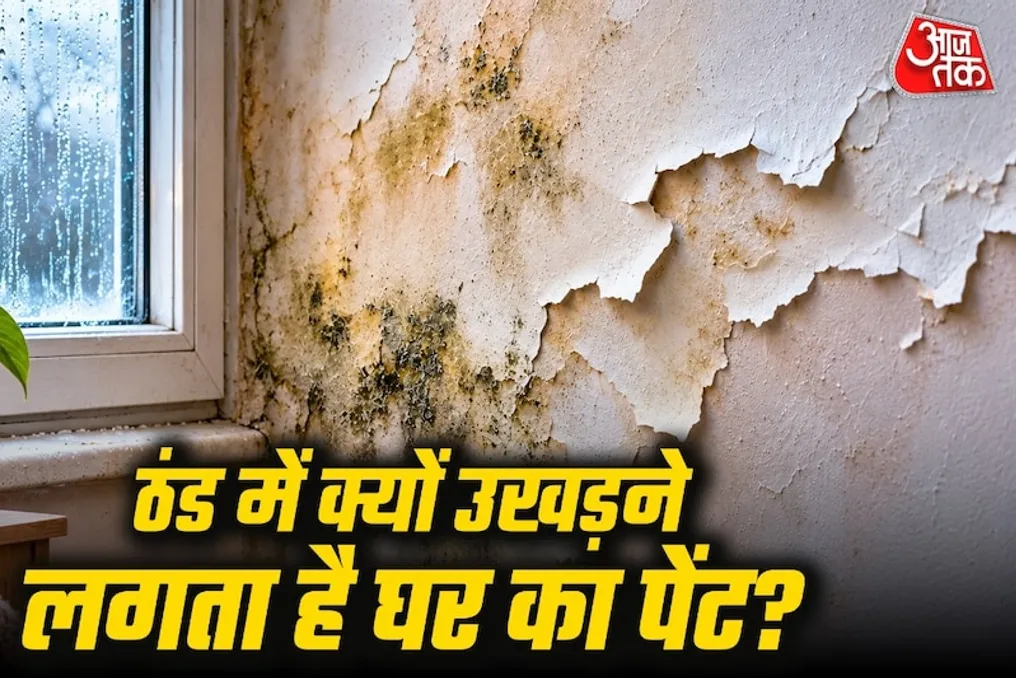
As the winter season begins, various problems often arise in homes, among which is the appearance of dampness on walls and paint peeling. It is noticeable that during cold weather, wet spots appear on the walls; sometimes the paint swells, and sometimes its layer begins to peel off like a crust. Black and green spots may also appear in the wall corners. Initially, people tend to consider this an ordinary inconvenience and ignore it. Some decide to repaint the wall, while others try to dry the damp area by applying fabric or newspaper. However, such actions do not eliminate the problem, and after some time, dampness reappears on the wall.

In fact, there are many reasons for dampness appearing on walls in winter. The main causes include increased humidity inside the house, insufficient air exchange, water penetration into the walls, and water ingress from the roof. If these causes are not eliminated in time, besides paint damage, mold can appear on the walls.

In winter, the outdoor temperature drops significantly, which affects the house walls. The walls become cold, while the indoor air humidity constantly increases due to cooking, showering, drying laundry, and breathing. When the warm and humid indoor atmosphere comes into contact with the cold walls, the water vapor in the air begins to turn into fine droplets. This process is called condensation. Simply put, it is similar to the formation of droplets on the outside of a cold bottle of water in winter, just as moisture can accumulate on cold walls.

Initially, this moisture appears on window panes, in wall corners, and behind cabinets. If the room lacks a proper ventilation system, this moisture can persist for a long time, gradually leading to signs of dampness on the walls.

Before painting the walls, it is crucial that the surface is clean and dry. If there is already moisture inside the wall, it can weaken the adhesion of the paint. With constant water or moisture in the wall, the layer between the paint and the wall is damaged. As a result, small bubbles begin to form on the paint surface. Over time, these bubbles burst, and the paint starts to peel off in a crust.

Sometimes white powder also appears on the wall. This happens when water inside the wall carries dissolved salts to the surface. After the water dries, these substances remain as a white layer. This problem is called efflorescence. This is why applying new paint to a damp wall without eliminating the root cause does not bring long-term benefit, as the paint can spoil again.

First reason: insufficient air exchange in the house. In winter, people close doors and windows to protect themselves from cold air. This prevents internal moisture from escaping. Vapor formed during cooking, showering, and breathing accumulates in the room, gradually affecting the walls.

Second reason: water leakage inside the walls. If there is a leak somewhere in the house's plumbing, water can slowly penetrate the wall. Even a small hole in the pipe can lead to a constant inflow of water. At first, this goes unnoticed, but then wet spots, paint swelling, and signs of dampness appear.

Third reason: leaks from the roof. If there are cracks in the roof or rainwater accumulates, it can slowly seep inside. This affects the roof and the associated walls. Dark spots often appear in the roof corners, and the paint begins to peel off.

Fourth reason: drying clothes indoors. Since there is little sun in winter, people dry wet clothes in rooms. Water from the clothes gradually evaporates into the air, increasing the humidity in the room. If the windows are closed, this moisture can settle on the walls.

Fifth reason: cracks in external walls. Small cracks in the exterior walls of the house allow rain and moisture from other sources to penetrate inside. Furthermore, a damaged layer of paint or plaster may not prevent water penetration. This leads to the appearance of dampness traces on the interior walls.

Sixth reason: moisture rising from the ground into the walls. In some houses, moisture contained in the soil begins to rise up from the lower parts of the walls. This phenomenon is called capillary rise of moisture. In such cases, dampness, paint peeling, and the appearance of white salt layers may be observed at the bottom of the wall. This problem often occurs when there is no proper moisture prevention system between the foundation and the walls.

If you want to avoid dampness on your home walls in winter, you need to take some simple steps.
Similar stories

Old broom can be turned into a decorative wall element by yourself
Read more
www.aajtak.in

Old broom can be turned into a decorative wall element by yourself

You should not throw an old, worn-out broom in the trash. From this item, you can create a magnificent decorative element for the home that will attract the attention of others.

In daily life, people use brooms for cleaning. However, when a broom wears out or its bristles become short, most people consider it useless and throw it in the bin. Many believe that no benefit can be derived from an old broom. Nevertheless, it is amazing that this worn-out broom can be used to decorate your own home.

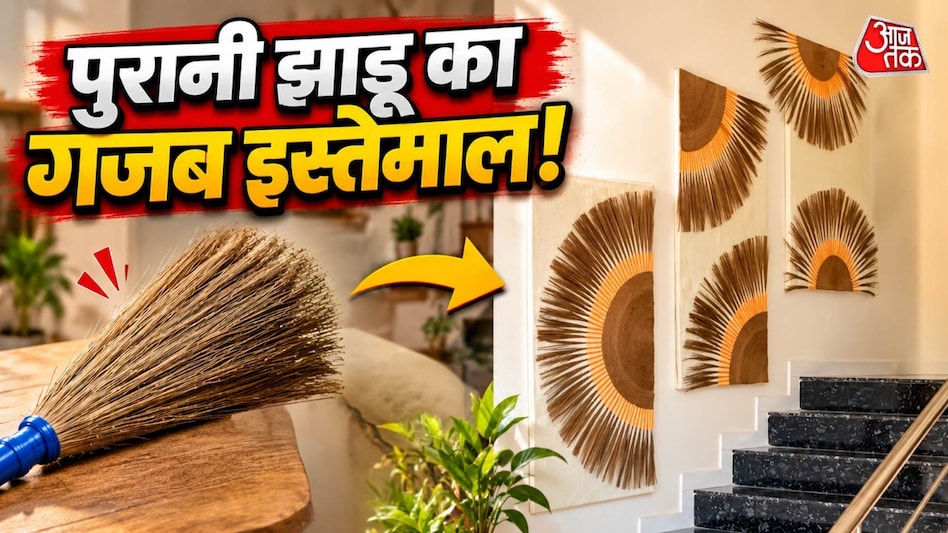
From an old broom, you can make a very beautiful decorative wall element. With colored thread, jute rope, and cardboard, you can turn it into a stunning wall panel that will amaze everyone who sees it. If you want to give your walls a stylish and modern look without large expenses, this option of wall art from an old broom can help you.

How to create a beautiful wall panel from an old broom

After the bristles of a broom, usually used in homes, wear out or become short, they are no longer used. Instead of throwing them away, you can create a design resembling sun rays. For this, the broom bristles are gathered into small bunches and decorated with colored threads. Then these bunches are connected using jute rope and cardboard, forming a beautiful decorative object.

The main advantage of this method is that you do not need to buy expensive decorative items to create it; you can use materials that are already at home and finish the item in the desired colors.

What you will need to make it?

To create a beautiful wall panel from an old broom, you will need the following things: bristles from an old marble broom. Tip: choose threads according to the color of your wall. Yellow, orange, golden, or cream threads will give the wall panel a beautiful look.

Step-by-step instructions for creating magnificent wall art from an old broom

  1. Separate the broom bristles: First, you need to separate the bristles from the old broom. Then, they should be cut into equal-length pieces depending on the needs. It is important that the bristles are not too small, as they will be used to create the design resembling the panel's rays.
  2. Decorate with colored threads: Next, form small bunches from the bristles. Tightly wrap the lower part of each bunch with an orange or yellow wool thread. This will make the ordinary bristles look beautiful and stylish. You can also alternate both colors.
  3. Create a base from cardboard and jute rope: Take thick cardboard and glue white paper to it. After that, roll the jute rope into a circle to get a ring. When the circle is formed, cut it in half with scissors to get a semi-circular design.
  4. Main part of the panel: This semi-circular design will be the main part of your wall panel. Securely glue the rope to the cardboard so that the structure is strong.
  5. Attach the bristles and create the design: Now glue the bunches of bristles decorated with colored threads along the edges of the jute rope. Arrange them so that they spread outwards, resembling sun rays. Try to leave equal distance between all bunches so that the design looks harmonious and balanced.
  6. Add final touches: After the entire design is ready, let the glue dry completely. Then hang the wall panel on the wall using a sturdy hook. Your inexpensive decorative item is ready.

Such a finished wall panel can make a simple wall attractive. It can be placed near the stairs, in the living room, bedroom, or hallway. The special feature of this sun ray design gives the wall a different look and adds a creative accent to the home decor.

If you want to make it even more beautiful, you can add small decorative lights or other elements of your choice. The main thing is to ensure that the wall panel is well glued and the bristles do not fall off easily.

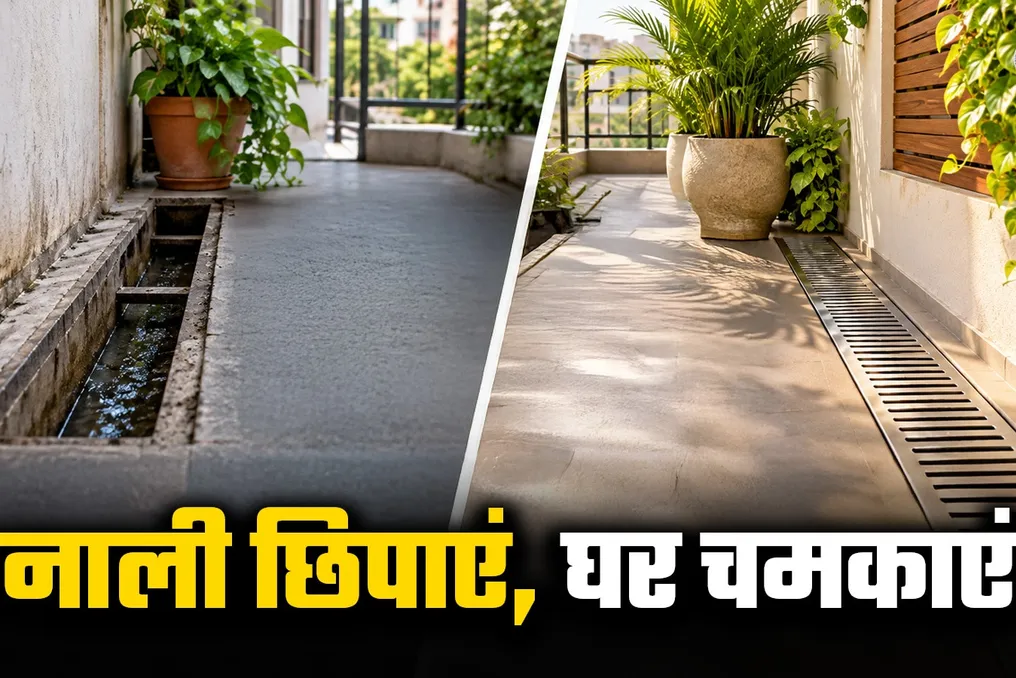
How to hide an open drainage channel: 9 stylish and budget-friendly ways for your home
Read more
www.aajtak.in

How to hide an open drainage channel: 9 stylish and budget-friendly ways for your home

Even if a house is impeccably clean, the presence of an open drainage channel on a balcony, in a bathroom, or in a yard can spoil the overall appearance of the dwelling. Furthermore, such channels can become a source of unpleasant odors and dirt accumulation. Usually, in such cases, people consider installing expensive covers or removing flooring. However, there are simple and inexpensive methods that allow you to cover the channel without major renovation.

These methods not only help conceal the drainage but also contribute to creating a clean and aesthetic look for the home. Below are nine simple methods that will improve the appearance of the residence and simplify the cleaning process.

  1. Using steel covers

    If you have an open channel in your bathroom or on your balcony, you can cover it with a stainless steel lid. These lids have small holes that ensure free water drainage. They can be removed and the drain easily cleaned when necessary.

  2. Installing tile-mimicking drainage covering

    To make the channel less noticeable on the floor, you can install a special drainage covering that resembles tiles. This allows it to blend harmoniously with the flooring. When installing, ensure that water drains properly and choose a covering that is easy to remove for cleaning.

  3. Decorating the area around the channel with colored stones

    In the yard, garden, or on the balcony, you can make the area around the channel more attractive by scattering colored pebbles. White, gray, or black stones give the place a beautiful look. It is important to remember not to throw stones directly into the channel, as this can block water flow.

  4. Laying wooden decking tiles on the balcony

    To conceal the drainage and improve the appearance of the balcony floor, you can use wooden decking tiles. You must choose tiles that are resistant to moisture and water. They should be laid in a way that allows water to drain freely, and the tiles should be removable for maintenance.

  5. Creating a green look with artificial turf

    On the balcony, you can lay artificial turf around the drainage channel to give the area a green and picturesque look. The turf should be placed so that it does not cover the channel and can be easily removed for cleaning.

  6. Masking the channel with potted plants

    On the balcony or in the yard, you can place pots with standing plants next to the channel. This will draw the eye away from the channel itself to the plants, making the space more aesthetic. You should ensure that the pots do not impede water drainage and that they can be easily moved during cleaning.

  7. Covering visible pipes with a PVC box

    Drainage pipes visible on walls in the bathroom, kitchen, or on the balcony can be hidden using a PVC box. Choosing a box that matches the wall color will help discreetly hide the pipe. It is important, however, to ensure that the box can be opened for pipe repair if necessary.

  8. Installing a sturdy concrete coating for outdoor channels

    For an open channel located outside the house, you can install a sturdy concrete coating. This will make the area tidier. The cover must be one that can be removed when necessary. If vehicles pass over this area, you should choose a coating capable of withstanding significant weight.

  9. Using decorative metal mesh

    To give the channel a beautiful appearance, you can install a metal mesh with a decorative pattern. It can be chosen to match the tile or the house railings. The mesh must allow water to pass through and be removable for cleaning purposes.

How to clean window and door mosquito screens without using water pressure in 4 simple steps
Read more
www.aajtak.in

How to clean window and door mosquito screens without using water pressure in 4 simple steps

As Diwali approaches, many people are preparing to tidy up their homes, and cleaning the screens on doors and windows is an important part of this process. Often, people clean floors, fans, and the windows themselves, but they avoid cleaning metal screens from accumulated dust and dirt because it takes a lot of time. Sometimes people try to wash the screens with hose water, but this only temporarily improves the appearance, as a thick layer of grime forms on them again, spoiling the look of a clean home.

Especially near the kitchen, sticky grease and smoke accumulate on the screens. Cleaning such screens usually takes many hours and effort. However, if you think that expensive cleaning agents are needed for this task, you are mistaken. With ordinary hot water, detergent, and liquid soap available at home, you can easily clean a dirty screen without extra effort.

To clean a metal screen on a door or window, you will need some common items that are easy to find at home.

Due to the accumulation of dust, dirt, and grease, cleaning a metal screen becomes a difficult task. In this case, a solution of hot water and detergent will help loosen the grime. First, you need to fill a basin with enough hot water that can be used safely, provided the water is not too hot.

Next, add a little washing powder and liquid dish soap to the water and mix thoroughly. Then, wet a sponge or soft cloth in this solution and gently apply it to the screen, trying to clean every part of it.

After applying the solution, leave it for about 10–15 minutes so that the settled dust and grease become soft. After that, carefully scrub the screen with a sponge or a soft brush. This will allow the dirt to come off easily, and you won't have to exert excessive effort.

After finishing the cleaning, wipe the screen with a clean, slightly damp cloth to remove any soap and detergent residue. Then, dry the screen completely with a dry cloth. It is important to avoid prolonged contact of water with the metal screen, as this increases the risk of rust.

When cleaning a metal screen, avoid scrubbing hard. If the screen is painted, test the solution on a small area first to minimize the risk of paint damage. Furthermore, if there is already rust or peeling paint on the screen, simple soap and water may not be enough to completely eliminate the problem.

It should also be remembered that you should not use excessively hot water for cleaning, and when working with the screen, you must protect adjacent wooden doors or electrical switches from getting wet.

By applying this simple method, you can clean regular dirt from door and window screens before Diwali. This will make the house cleaner and save you unnecessary hassle in preparing for the holiday.

Popular