
Step-by-step guide from gardener Deli on growing pomegranate on a balcony in October
Read more
The Better India
thebetterindia.com

Step-by-step guide from gardener Deli on growing pomegranate on a balcony in October

Pomegranates do not require a garden; it is sufficient to have a sunny terrace, balcony, or small open space to plant a pomegranate in a pot, provided that the appropriate container, soil, and care rules are used.

Anish Sinha, a creator of gardening materials who runs the @delhidudes channel on Instagram, demonstrated how he grows pomegranates in containers at home. His work focuses on organic and terrace gardening, and his profile states that he is an ecology enthusiast and organic gardener.

In a video published in 2025, he discussed growing pomegranates in pots and recommended the Super Bhagwa variety. If you plan to start growing in October, here is a detailed guide.

The method used by Sinha involves using a 16-inch pot. However, Navbharat Times reports that a container with a diameter and depth of at least 12 inches will suffice, although a larger pot will provide more room for the roots. Regardless of the chosen size, drainage is crucial: there must be holes at the bottom of the pot to drain excess water.

For a plant intended for long-term fruiting, gardening recommendations usually lean towards choosing a significantly larger container than the minimum size mentioned in his video. A gardening guide from Times of India advises using a pot with a width and depth of about 18–24 inches for pomegranates grown on a balcony.

Pomegranates do not tolerate stagnant, moist soil. Sinha's soil mix consists of garden soil, sand, and cow manure in equal proportions. He also recommends adding components such as neem cake, coconut fiber, and vermicompost.

The main point remains drainage. ICAR studies describe the pomegranate as a hardy fruit crop capable of tolerating heat, drought, and moisture deficiency, while the National Horticultural Council notes that the crop can grow in relatively challenging soil conditions. When using a container, one should avoid creating a heavy or dense mixture; a loose mixture that allows excess water to drain while retaining sufficient moisture is better.

Sinha recommends the Super Bhagwa variety for growing pomegranates in pots. According to the National Horticultural Council, this variety is a type of Bhagwa. Data also indicates that Super Bhagwa ripens approximately two to three weeks earlier than Bhagwa in commercial cultivation. Bhagwa itself is one of the main pomegranate varieties in India.

ICAR includes Bhagwa in the list of promising varieties for regions such as Maharashtra, Andhra Pradesh, and Karnataka, and the National Horticultural Council lists it in several states where pomegranates are grown. For a home garden, it is preferable to purchase a healthy grafted or vegetatively propagated plant from a reliable nursery rather than relying on seeds if the goal is earlier and more predictable fruiting.

The gardener suggests starting by laying a layer of dry leaves at the bottom of the container before adding the soil mix. He advises filling the container in layers and letting the prepared pot sit for about a week before planting.

If you are starting with seedlings from a nursery, carefully place them in the prepared container without damaging the root ball. Fill the space around them with the soil mix and water lightly. Those starting from seeds can follow a different path. Sinha's method involves soaking the seeds for about 23 hours before sowing at a depth of about half an inch and at a distance of about two inches from each other. He claims that the seeds can germinate in two to three weeks while maintaining soil moisture. However, for beginners, a healthy seedling from a nursery is a simpler option.

After planting, the pot should be placed where the pomegranate will receive intense sunlight. This could be a terrace, balcony, or another open area of the house. The pomegranate is naturally adapted to warm and relatively dry climates. ICAR describes this crop as heat and drought resistant, and container growing recommendations suggest about six to eight hours of direct sunlight for good growth and fruiting.

The fruit requires water, but constantly moist soil can cause problems. The gardener advises reducing watering during the rainy season and ensuring the soil does not remain soggy. In hot weather, the plant may require more frequent watering. The best approach is to check the soil condition before watering, rather than following a fixed schedule. Water generously when the soil begins to dry out, and then allow excess water to drain.

Sinha recommends using organic fertilizers, such as cow manure and neem cake, to replenish nutrients. Nutrients in a pot are gradually depleted as the plant grows, so periodic feeding is very important. Pruning also helps maintain the manageability of the container plant. Remove dead or weak shoots and unwanted growth appearing at the base. Keeping the plant open improves air circulation around the branches.

With a sunny spot, the right variety, a well-draining pot, and regular care, the pomegranate can become a productive part of even a small home garden. If you want to start growing in October, a healthy seedling from a nursery can be the simplest start.
Similar stories

Gardener from Hyderabad shares tips on growing Asian lilies indoors in autumn
Read more
thebetterindia.com

Gardener from Hyderabad shares tips on growing Asian lilies indoors in autumn

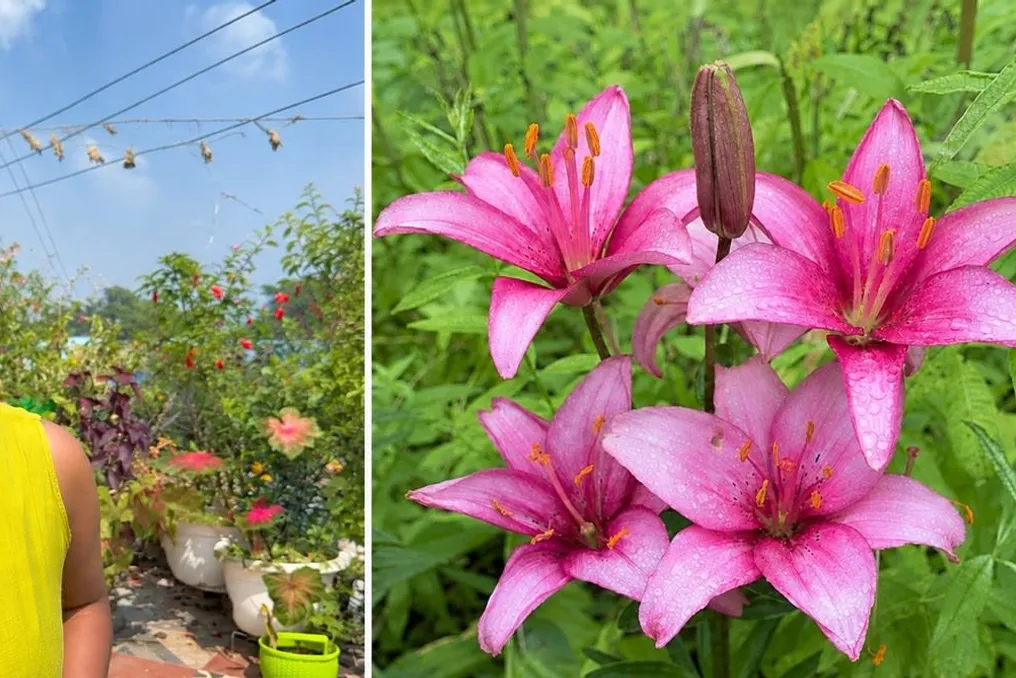
If you have long wanted to add bright colors to your garden, October is a suitable time to start growing Asian lilies. These flowers are known for their light and cheerful buds and are relatively easy to cultivate at home.

According to the gardening expert from Hyderabad, Shaili, the optimal period for planting these lilies is during the autumn-winter period. If the rains have stopped, planting can begin and continue until December.

When to start

Shaili, who shares gardening and craft tips on Instagram, states that the best time to plant is October-November. For gardeners in regions where the monsoon season has just ended, this is a convenient time to put bulbs into the soil. During this period, the weather is usually more favorable for the plant to strengthen before active growth begins.

Ensure sunlight

Growing lilies does not require a large area or a spot exposed to sunlight all day. The gardener notes that Asian lilies can grow with approximately three to four hours of sunlight. More prolonged exposure to the sun will be even better.

It is recommended to find a bright spot on a balcony, terrace, or in the garden where the plant can receive several hours of direct sunlight.

Do not overwater

One of the simplest ways to care for a lily is by observing the condition of the soil rather than following a strict watering schedule. Shaili explains: 'Water it only when the top layer of the soil looks dry.' Before watering, it is enough to lightly touch the top layer of the earth; if it remains moist, one should wait. When the top layer of the soil feels dry, it is time to water the plant.

Keep care simple

The best news for gardening beginners is that Asian lilies do not require constant attention. As she says: 'They do not need a lot of care.' Thus, if you were looking for a flowering plant to try this season, the Asian lily can be an easy choice. Provide it with a suitable planting period, sufficient sunlight, and water only when the soil dries out.

Gardener shares method for growing water lilies indoors using two pots
Read more
thebetterindia.com

Gardener shares method for growing water lilies indoors using two pots

Many people can admire water lilies blooming in ponds and assume that a large body of water is required for their growth. However, these flowers can be successfully cultivated at home, even if you only have a sunny terrace, balcony, or corner in the garden.

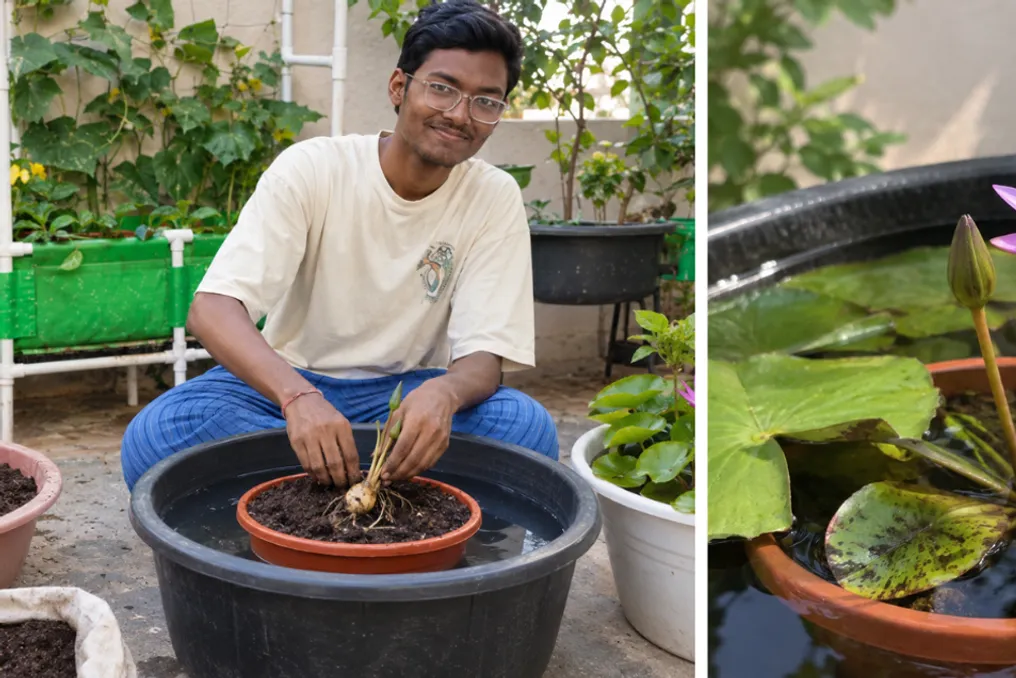
The gardener and gardening content creator Deepu, based in Ananthapur and sharing gardening tips on Instagram under the handle @gardening.with.deepu, uses a simple pot-in-pot planting method to grow water lilies. To start, he only needs two pots, potting soil, compost, and a sunny spot.

Below is a step-by-step guide to the process.

How to implement the process

  1. Start with two pots

    Take a plant pot measuring 10 to 12 inches with drainage holes. You will also need a larger container, bucket, or basin with a diameter of 16 to 20 inches that has no holes. The smaller pot will contain the water lily and soil, and the larger one will hold the water around it.

  2. Prepare the soil

    Fill the smaller pot about three-quarters full with a mixture consisting of 70 percent potting soil and 30 percent compost. It is important that the mixture is sufficiently heavy. The gardener advises avoiding coconut fiber and other light soil mixtures, as they may float after placing the pot in water.

  3. Plant the rhizome

    Place the water lily rhizome in the soil at a slight angle, directing the growing tip upwards. Gently cover it with soil, leaving the growing tip in such a position that it can produce new growth.

  4. Cover the soil

    After the rhizome is established, apply a thin layer of sand or small stones over the soil. This will prevent the soil from floating when you start filling the outer container with water.

  5. Add water

    Now place the smaller pot inside the larger container. Slowly pour water into the outer container until the water level is about five to ten centimeters above the soil level. As the water lily grows, the depth can gradually be increased to 20-30 cm.

  6. Let the sun do its work

    Find a spot where the water lily receives about six to eight hours of direct sunlight daily. This is especially critical if you are waiting for flowers to appear. The more suitable light the plant receives, the higher its chances of flowering.

  7. Ensure regular care

    As the plant grows, periodically remove old leaves and maintain a constant water level. Compost can be added to the pot monthly. Deepu suggests wrapping the compost in a piece of fabric before adding it so that it remains localized and does not spread through the water.

Advantages of using the two-pot system

The pot-in-pot planting method allows the soil and water to remain separated, providing the water lily with the necessary conditions for development. Furthermore, it simplifies tasks such as changing water, adding compost, or removing the plant for repotting or division. Thus, to enjoy a water lily at home, you do not necessarily need a pond; a pair of pots and a sunny spot can be enough to start.

Popular