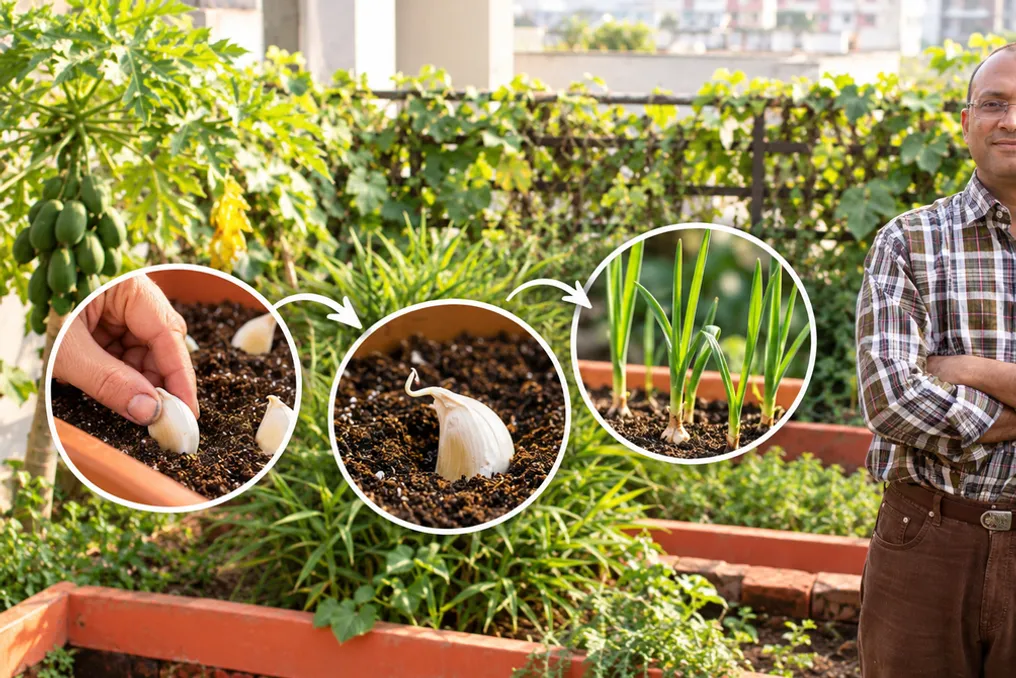
Instead of using a garlic clove for cooking, it can be planted and grow into a full head of garlic. October is a suitable time to start this process.
In many regions of India, garlic can be sown from October to November, as the cooler months give the plant time to grow. No farm or large terrace is required to start; a sunny spot, a pot, and several healthy cloves are enough.
Siddhartha Sikdar, an IT consultant from Pune, knows this through his own experience. He started gardening in 2012 and gradually transformed a terrace of less than 2000 square feet into a thriving garden where he grows fruits, vegetables, herbs, and spices, including garlic.
One harvest was particularly memorable when garlic prices rose to nearly 300 rupees per kilogram. Instead of keeping the harvested heads for himself, Siddhartha's daughter brought fresh garlic to neighbors, which he jokingly called 'garlic diplomacy.' For Siddhartha, growing food at home has always been linked not only to the harvest but also to experimentation and learning.
He advises beginners to start small, learn from those who already grow produce, and not to be afraid of mistakes. If you have a few leftover garlic cloves in your kitchen in October, here is how you can turn them into your own harvest.
1. Choosing Healthy Garlic Cloves
Garlic is cultivated from individual cloves, not seeds. You must start with a whole, healthy bulb and carefully separate the cloves while keeping the papery skin around each one. Choose firm cloves without visible damage, softness, or signs of rot. It is advisable to consult a local gardener or nursery about varieties that grow well in the region.
Sikdar's approach to gardening involved studying various methods and learning from experienced growers. His advice is also useful for beginners: you don't need to know everything before starting; a little help and trial and error are part of learning to garden.
2. Selecting a Suitable Pot
Garlic grows well in containers provided the pot offers enough space for roots and developing bulbs. You should choose a container at least 20–25 cm deep with drainage holes at the bottom. If using a wider container to plant several cloves, leave enough space between them instead of planting them too close together. Good drainage is critical, as garlic does not tolerate waterlogged soil.
3. Soil Preparation
The pot should be filled with loose, fertile, and well-drained soil. A simple homemade mix can include garden soil, mature compost, and coconut fiber or coarse sand to improve drainage and prevent soil compaction. Sikdar's journey in gardening also taught him the importance of soil care. In his terrace garden, he focused on creating healthy soil, not just adding nutrients for plant growth.
For a container garden, this means starting with soil that can retain moisture and nutrients while allowing excess water to drain away.
4. Planting the Cloves
Before planting, inspect each garlic clove carefully. The pointed end should face upwards. Make a small indentation in the soil and place the clove with the pointed end up. Cover with soil and water lightly. If you are planting several cloves in one container, leave enough space between them for the bulbs to develop. Do not disturb them after planting and allow the cloves time to root.
5. Finding a Sunny Spot
Place the pot in a location that receives plenty of sunlight. A sunny balcony, terrace, or other open area is suitable. Garlic requires sufficient sunlight during leaf growth and bulb development underground. Sikdar's experience serves as a reminder for beginners that you can start with any available space. His terrace garden developed gradually, rather than appearing overnight.
6. Careful Watering
Garlic needs moisture while growing, but the soil should not be constantly wet. Check the soil before watering. If the top layer feels dry, water the plant and let the excess drain through the bottom holes. As the bulbs mature, garlic requires relatively drier conditions. Excessive moisture during the harvest period can increase the risk of bulb rot. Siddhartha also designed his terrace garden with moisture retention in mind, which reduced the need for watering once the garden was established.
7. Giving the Plant Time
After planting, green shoots will first appear from the soil. The leaves will continue to grow while the bulb develops underground. This harvest requires patience. Depending on the variety and growing conditions, garlic may take several months to be ready for harvest. This patience reflects the Pune gardener's approach to gardening. He urges beginners to enjoy the process rather than focusing excessively on how much they will ultimately harvest.
8. Looking for Signs of Readiness
As the garlic matures, some leaves will begin to yellow and dry out. This is a good sign that the bulb underground is approaching maturity. Instead of digging up the plant too early, let it complete its growth cycle. When the bulb is ready, loosen the soil around it and carefully extract it.
9. Drying the Bulbs Before Storage
Freshly harvested garlic must be dried before storage. Place the bulbs in a cool, dry, and well-ventilated area and let them dry. The outer skin should become dry and papery. After proper drying, trim the roots and leaves if necessary and store the bulbs in a dry place with good air circulation.
Sikdar's terrace garden demonstrates how much can be achieved by starting with a small piece of urban land. His journey began as an interest in growing food and eventually turned into a garden full of vegetables, fruits, herbs, and spices. Therefore, when October arrives, set aside a few pots for garlic. Over time, the cloves you plant can turn into fresh bulbs grown right at home.