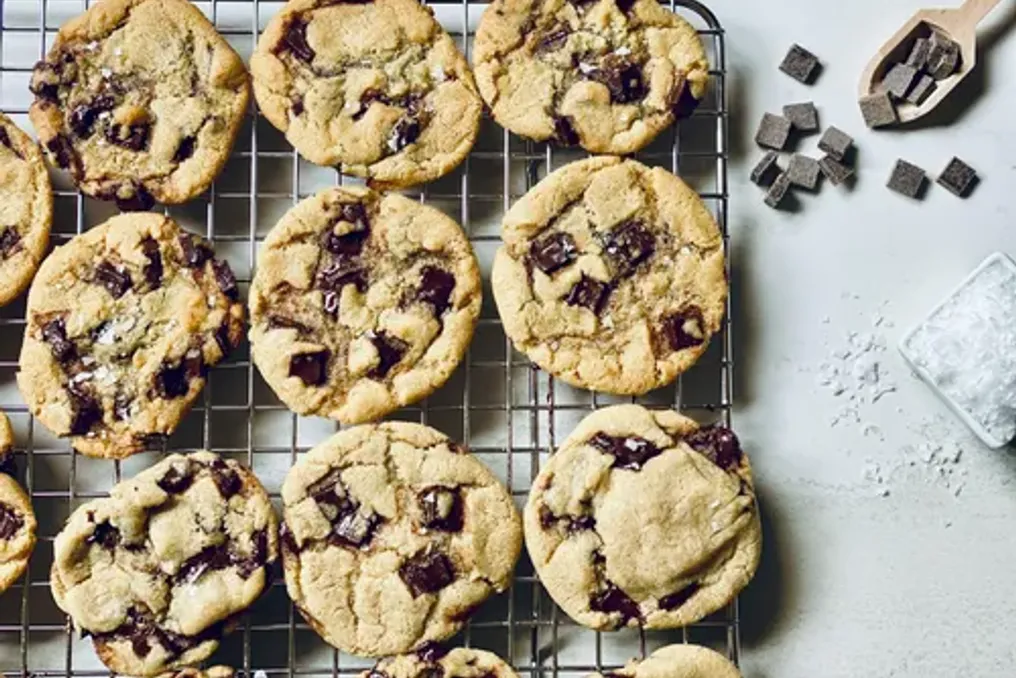
A chocolate chip cookie recipe is a fundamental element of any kitchen arsenal that will be useful to any home baker. These cookies are suitable for various occasions, whether baking on the weekend with children or preparing weekly supplies.
A chocolate chip cookie recipe is a fundamental element of any kitchen arsenal that will be useful to any home baker. These cookies are suitable for various occasions, whether baking on the weekend with children or preparing weekly supplies.
This simple recipe allows you to achieve cookies with crispy edges, soft centers, and plenty of chocolate in every bite. Applying a few simple techniques helps achieve the perfect texture that everyone prefers.
To make approximately 24 cookies, you will need the following ingredients: 1 cup of salted, softened butter; 1 cup of granulated sugar; 1 cup of packed brown sugar; 2 teaspoons of pure vanilla extract; 2 large eggs; 3 cups of cake or wheat flour; 1 teaspoon of baking soda; ½ teaspoon of baking powder; 1 teaspoon of sea salt, and 2 cups of chocolate chips.
The process begins by preheating the oven to 190°C (375°F) and lining baking sheets with parchment paper. In a medium bowl, mix the flour, baking soda, baking powder, and sea salt. In a large bowl, beat the softened butter with the granulated and brown sugars until smooth. Then, add the eggs one by one, followed by the vanilla extract, and continue beating for about a minute until the mixture becomes lighter.
Gradually add the dry components and mix until a soft dough forms. Finally, gently fold in the chocolate chips until evenly distributed. Portion the dough into balls of two to three tablespoons and place them on the prepared baking sheets, leaving enough space between them to allow for spreading. To achieve soft and chewy cookies, bake for 8–10 minutes, and for a crispier option, bake for 11–13 minutes. After baking, let the cookies cool on the tray for five minutes before transferring them to a rack to cool completely.
It is important to avoid overbaking. One common mistake made by home bakers is removing the cookies only when they look completely done. If the goal is a soft center, the cookies should be removed as soon as the edges start to turn golden, while the middle still looks slightly underbaked. The heat from the tray continues the cooking process after removal, ensuring that the centers set while remaining soft.
If the cookies remain in the oven until the tops are fully browned, they will continue to cook during cooling and may become dry. Furthermore, there are several recommendations for choosing chocolate: traditional chips hold their shape well, but semi-sweet chips provide a balanced sweetness, milk chocolate yields a sweeter cookie, and dark chocolate imparts a rich flavor with less sweetness. For an uneven texture, you can finely chop quality chocolate bars instead of using chips, or combine two types of chocolate to enhance the flavor profile.
The cookies must rest on the tray for five minutes after being removed. During this time, residual heat finishes cooking the centers, preventing them from drying out. Immediate transfer can cause the cookies to break because they have not yet stabilized. Afterward, they are moved to a rack to allow air circulation from below and prevent the bottom from becoming soggy.
Homemade cookie dough can be frozen, which is a convenient way to save time. The dough is prepared as usual, formed into balls, and placed on a parchment-lined baking sheet, then frozen until solid. After this, the balls are transferred to a freezer-safe container or a bag, sealing out the air. The container should be labeled with the date, and for best quality, use the dough within three months.
Frozen dough can be placed directly into the oven. Preheat the oven to 190°C (375°F), and place the frozen balls on a lined baking sheet, maintaining spacing. Bake them just as you would fresh dough, but add an extra two to three minutes to the total time. Instead of relying solely on the timer, aim for slightly golden edges and centers that still appear somewhat soft if you are aiming for a chewy result.
Although curry may be the main dish, lovers of authentic Cape Malay cuisine emphasize that roti plays an equally important role. A good roti should be soft enough to tear by hand, sturdy enough to hold thick curry, and layered enough to flake with every bite.
This recipe, developed by late Fatima Sidou, allows for the preparation of light, buttery rotis, perfect for serving with chicken, lamb, beef, or vegetable curries. It is sized for a small family and requires only a few pantry staples.
To begin, mix flour, salt, and warm water in a large bowl until a soft dough forms. If the dough seems too sticky, add another two or three tablespoons of flour. Knead the dough for about a minute until smooth. Then, divide the dough into small balls.
Each ball is rolled out into a thin disk on a lightly oiled work surface. A thin layer of room-temperature butter is applied to each disk, after which the disk is rolled into a long sausage shape. Starting from both ends, the dough is rolled towards the center, forming an S-shape, and then one side is folded over the other.
The rolled dough is covered with plastic wrap and placed in the freezer for 30 minutes or in the refrigerator for several hours. Afterward, each piece of dough is rolled out again to the size of a plate. A pan heated over medium heat is used to fry each roti for about 50 seconds on one side. Then, it is flipped and cooked the second side until light golden brown.
After removing the roti from the pan, it is gently slapped with hands to separate the layers. The finished roti is served warm with your favorite curry.
Fatima Sidou advises rolling the dough as thinly as possible on a lightly oiled surface and always using room-temperature butter. These two simple steps contribute to creating a light, flaky, and crisp roti.
Slapping the roti after cooking is not just a tradition, but a final step that helps separate the delicate layers formed during the rolling and shaping process. As soon as the roti is removed from the hot pan, it must be gently slapped several times with the palms. The trapped steam loosens the layers, giving the roti its characteristic flaky texture while maintaining softness inside.
The secret to flakiness lies in technique, not ingredients. The thinner the dough is rolled, the more layers will form after folding. Butter acts as a barrier between these layers, so even distribution of butter is crucial. Resting the dough before the final rolling also makes a noticeable difference. Chilling allows the gluten to relax and the butter to firm up, which facilitates rolling without losing layers. Finally, the roti should be cooked on a properly heated pan: too high a heat will cause browning on the outside before it is cooked through inside, and too low a heat will make the roti dry instead of soft and flaky.